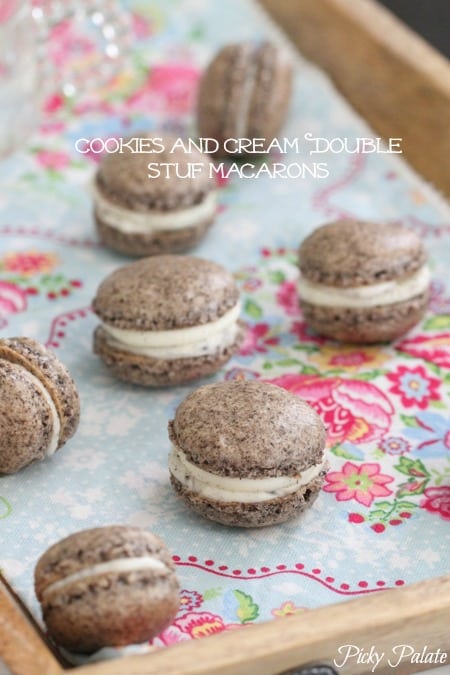
My Homemade Cookies and Cream French Macarons are the ultimate treat! Sharing how to make macarons today! With my step by step instructions, you are on your way to making your own French Macarons at home!
How To Make Macarons
So excited to show you how to make macarons today! I adore macarons. Wait, I should say, I adore eating macarons. There is a lovely little macaron shop down the street from my house that I pick a few up on a regular basis and savor every bite. There’s just something about them that makes me so happy. Also, The Bouchon Bakery macarons make my heart sing. If you haven’t had one, be sure to order one in this lifetime. They are amazing. Note, I am not a professional. These are not perfect “French” macarons, but they are DELICIOUS macarons by me 🙂
Try my Cap’n Crunch Macarons recipe too! Follow Picky Palate on Instagram for daily recipe inspiration.
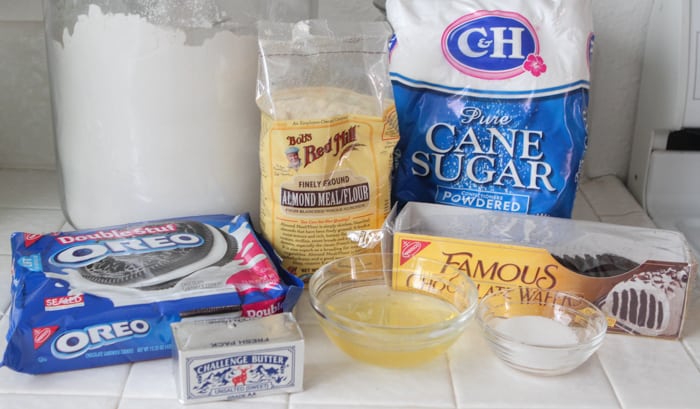
Here’s everything I used for the recipe. The glass bowls are egg whites and granulated sugar.
How To Make Macarons
- Preheat oven to 280 degrees F. and line a large baking sheet with parchment paper. Weigh your egg whites, almond flour, powdered sugar, granulated sugar and ground chocolate wafers on your food scale.
- In a stand mixer with the whisk attachment add your weighed out egg whites, and sugar beating on medium speed. Beat on medium-high until stiff peaks form. Takes close to 5 minutes. See pictures for visuals. Set aside for a couple minutes.
- Place the powdered sugar, almond flour and chocolate wafers into a large mixing bowl. Stir to combine. Place in a sifter or fine sieve and sift until all dry ingredients have passed through. Gently fold in the egg whites to the dry ingredients, mixing only until just combined. See pictures for visuals
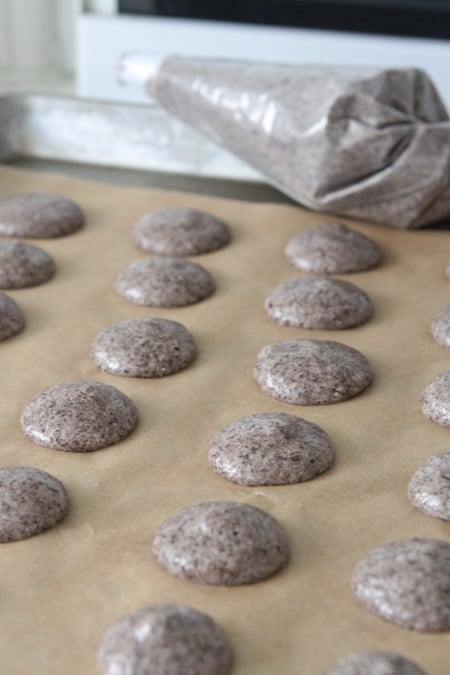
- Place batter into a large pastry bag with a large round tip attached. Pipe rounds, about 1/2 inch apart onto a parchment lined baking sheet. Give a good tap or two of the pan to remove any bubbles.
- Bake macarons for 22-25 minutes. You’ll see a shell on top with “feet” around the edges. Let cool completely before removing. Once cooled, take an offset spatula to loosen from parchment. Pair the macarons close in size to each other to prepare for filling.
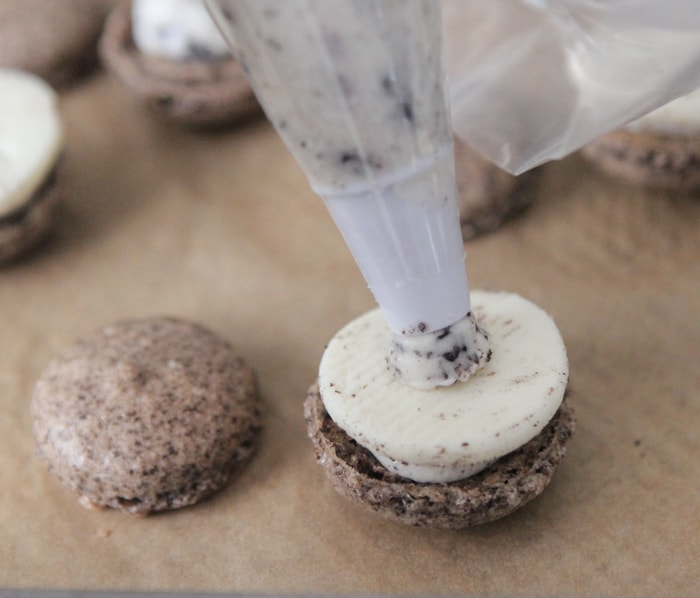
- To prepare buttercream, beat softened butter and powdered sugar until creamy and smooth. Add 2 crushed Oreo Cookies to the frosting, beating until combined. Place buttercream into a medium pastry bag with a large round tip attached and pipe a dollop of frosting on the center of a macaron. Top with the cream center of an Oreo Cookie if desired, place one more smaller dollop of frosting over the cream center then top with a second macaron. See pictures for visuals. Serve room temperature. Store any remaining macarons in the refrigerator.
What Tools Do You Need To Make Macarons?
These 3 things are a must when making macarons. You have to invest in a little food scale. Mine is by oxo. Found it at Sur la Table for about $30. I know that Bed Bath and Beyond sell them and you can use those 20% off coupons they always mail out. You’ll also need a large round tip and pastry bag. I believe the tip is a size 10, mine in the photograph is roughly 1/2 cm in diameter. Note: I used a large ziploc bag with the pastry tip attached–cut a small snip from a corner of the ziploc and push the tip through–a couple days ago and it works great. If you run out of a pastry bag or just don’t feel like buying one, use a trusty large ziploc bag. You will also need a piping tip.
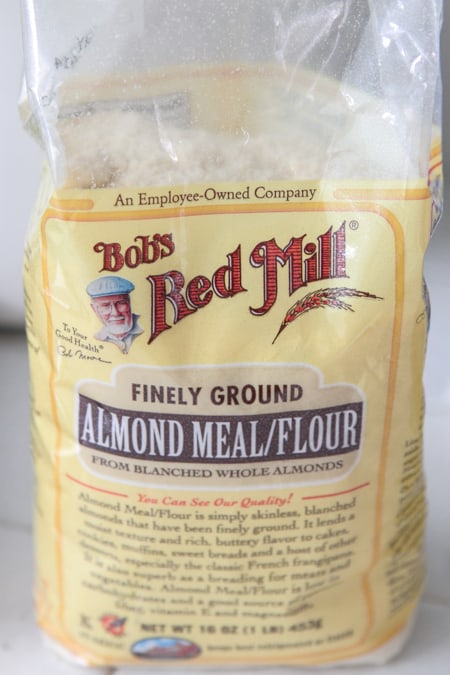
Bob’s Red Mill makes Almond meal/flour that you’ll need. I’m sure you can find it in the bins of any health food grocery store too.
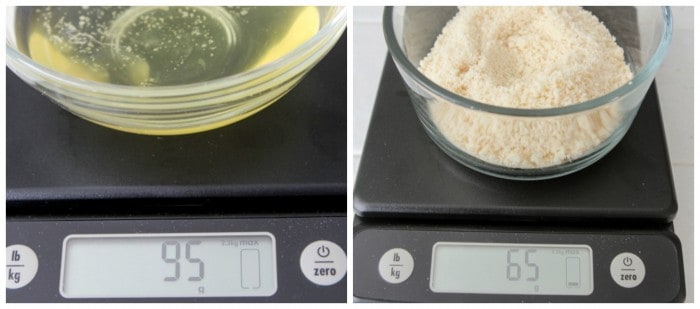
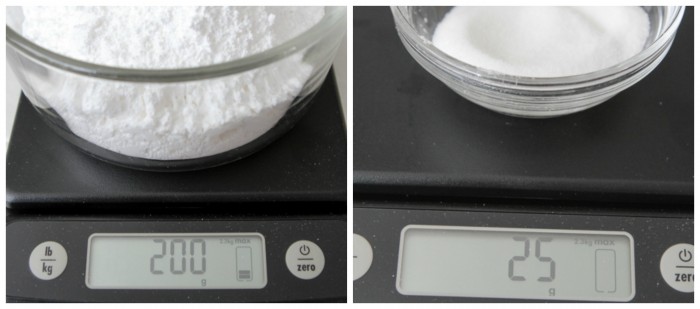
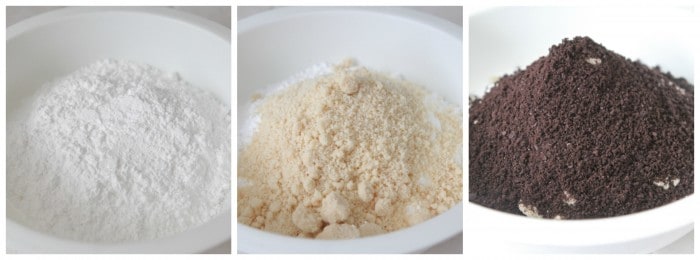
The scale is really easy to use. You’ll first place your empty bowl on the scale then hit the zero button on the right to bring the number back to zero. Place your ingredients in the bowl once that number is zero. To start, you’ll need 95 grams of egg whites (equal to nearly 3 large eggs) and 65 grams of almond flour.
You’ll also need 200 grams of powdered sugar and 25 grams of granulated sugar.
For the macaron batter, I used ground up chocolate wafers. They are basically the cookie part of an Oreo without the cream. I found mine located on an end cap near the ice cream section of my grocery store. As much as I could scrape most of the cream from an actual Oreo cookie, there’s still remnants left. That’s why I chose to use the wafers. You’ll need 45 grams of ground chocolate wafers. I placed a handful of the wafers (between 6 and 8 cookies) in a Ziploc baggie, zipped it closed then rolled over them with my rolling pin until finely ground. If you have leftover crumbs they are great sprinkled over ice cream or cupcakes….or spoonfuls of peanut butter.
Beat Egg Whites
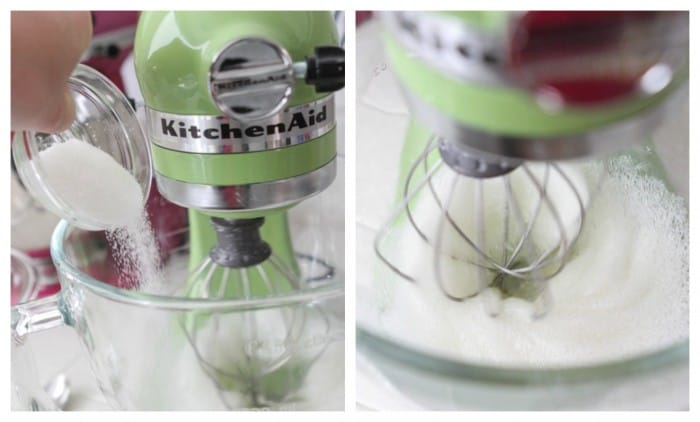
Ok, now that everything is measured out, you’ll start by adding your eggs and sugar to the mixer. Beat on medium high until the egg whites become stiff. This was another topic brought up by Brave Tart. Some people beat the eggs first for a minute or two before adding the sugar, but she just adds the sugar right away with the same results. I did it this way as well and had no problems. *You can tell by now, that if there are time saving ways, I will hunt them down, lol!
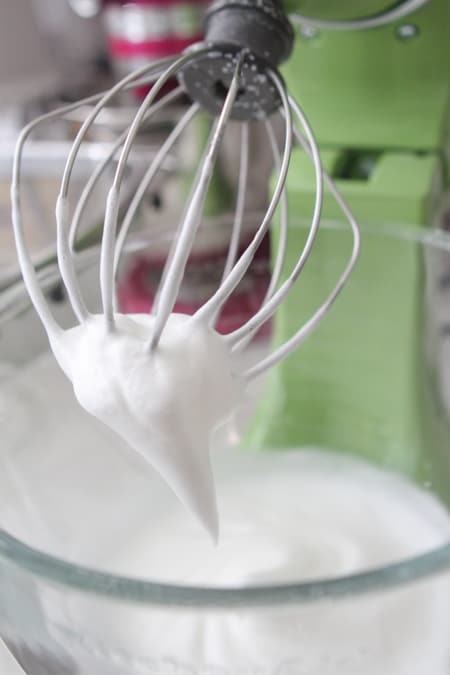
In the above picture, the egg whites are not quite done; this is considered soft peaks. However, we are looking for stiff peaks.
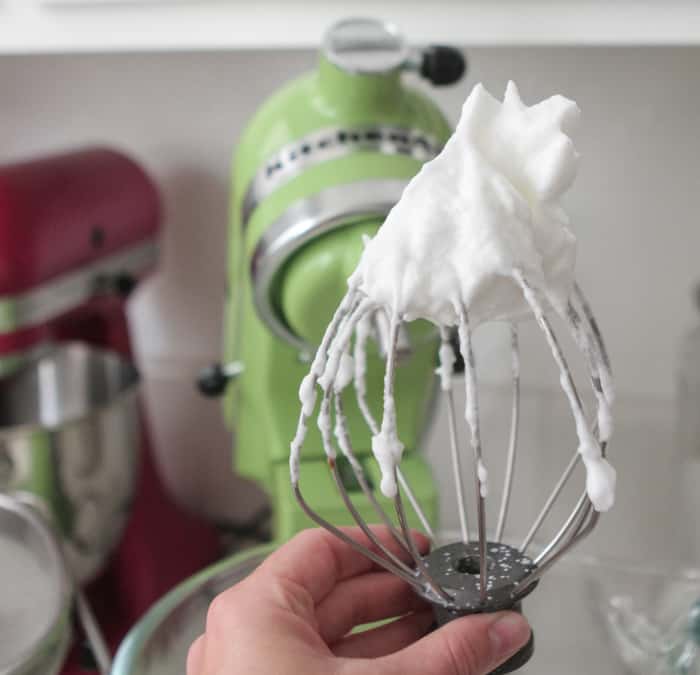
This is what stiff peaks looks like. They stand up when you hold up the beater. Set this aside for a couple minutes.
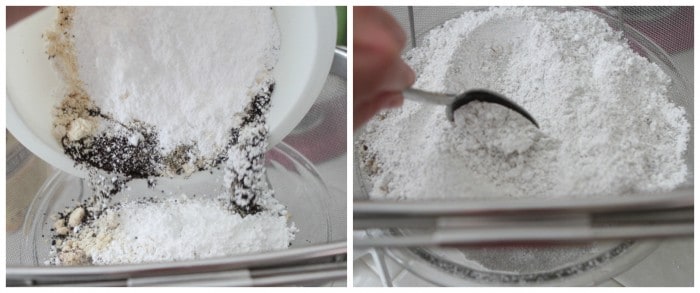
In a large mixing bowl, stir together your powdered sugar, almond flour and ground chocolate wafers. You can place all of these ingredients into a food processor to mix, but I found just stirring them and running them through a sifter worked fine.
Sift Dry Ingredients
Sift all of these ingredients together. A traditional sifter is the easiest way, meaning the type with the handle that you squeeze. For some reason I do not own one, so I run the mixture through a very fine sieve and that works too. The sieve definitely takes longer. I’ll be purchasing a hand held sifter and report my results. I’m sure it’s the same.
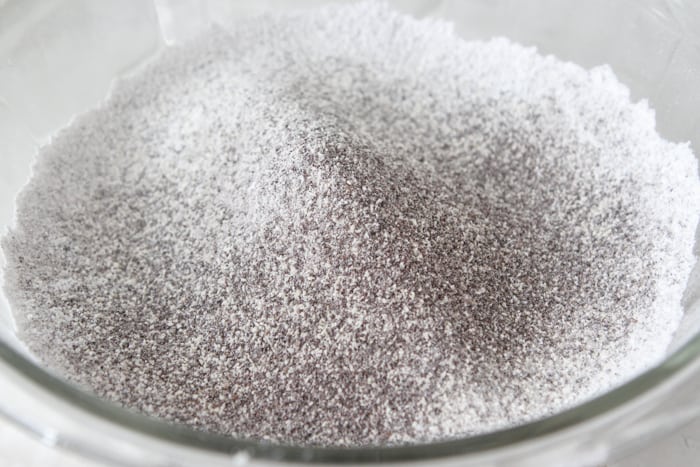
You want your dry ingredients to be nicely sifted like so.
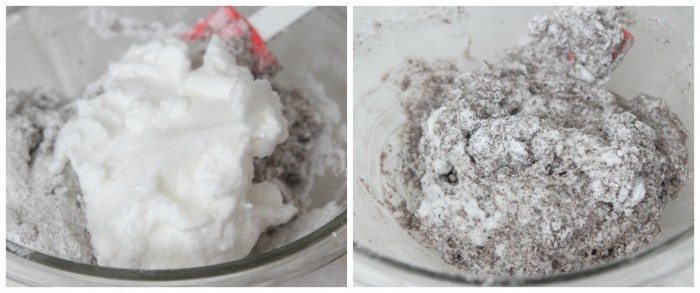
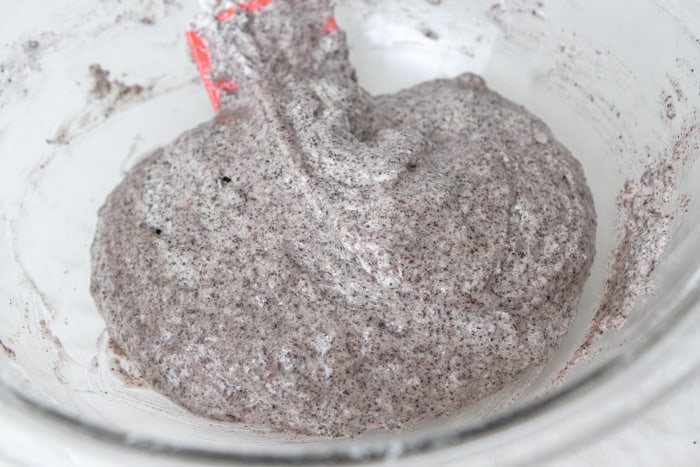
Fold in the egg whites nice and easy. Almost done in picture 2. Note, that you can fold your egg whites into the dry ingredients in batches, but I add them all at once with no problems. Just don’t over mix!!
Done! Be sure to not over mix. Just fold and stir until combined.
Place Macaron Batter In Piping Bag
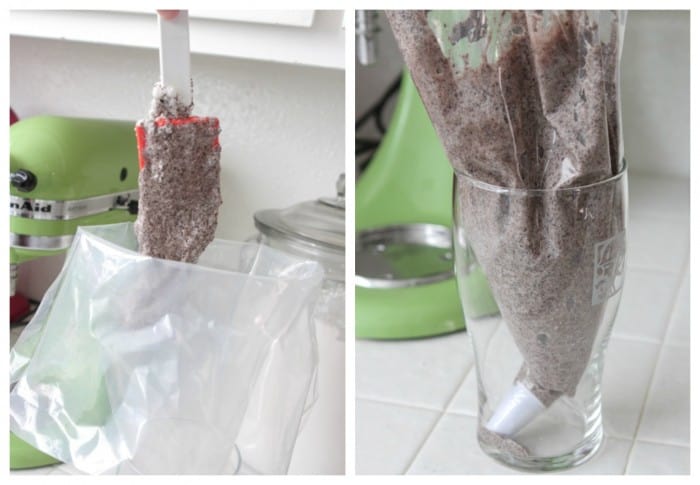
You want to place the macaron batter into your piping bag with the round tip attached.
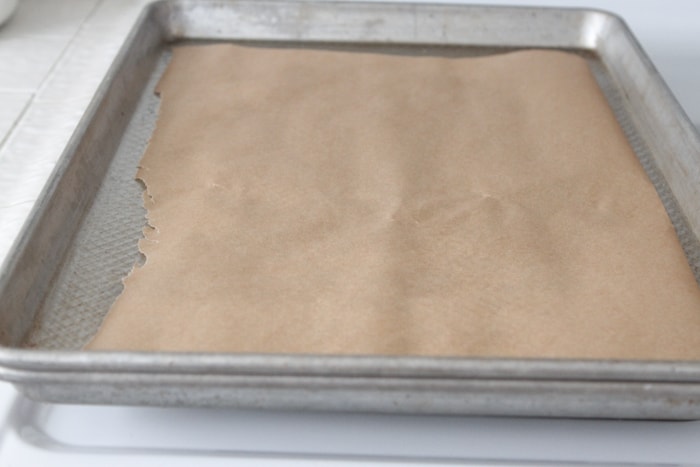
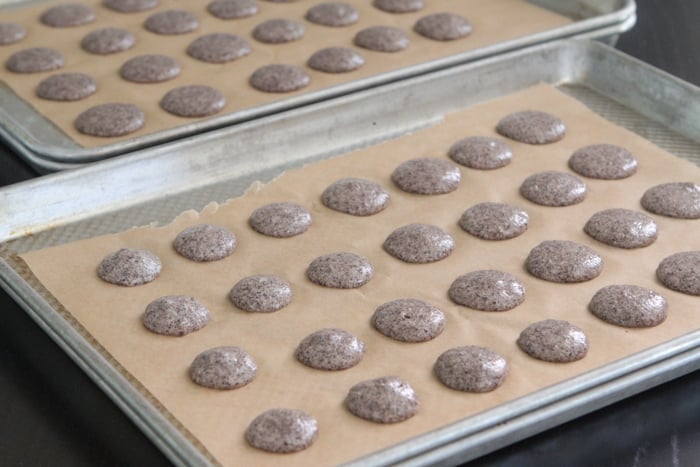
Place parchment paper over a nice large baking sheet. I used the half sheet size. Please note, I tried double stacking my baking sheets (known to bake your macarons more evenly) and I tried just baking on one. Same results, so no stacking of baking sheets needed. Also note, I recommend using the traditional white parchment. I ran out and used the “natural” version above, which I didn’t love.
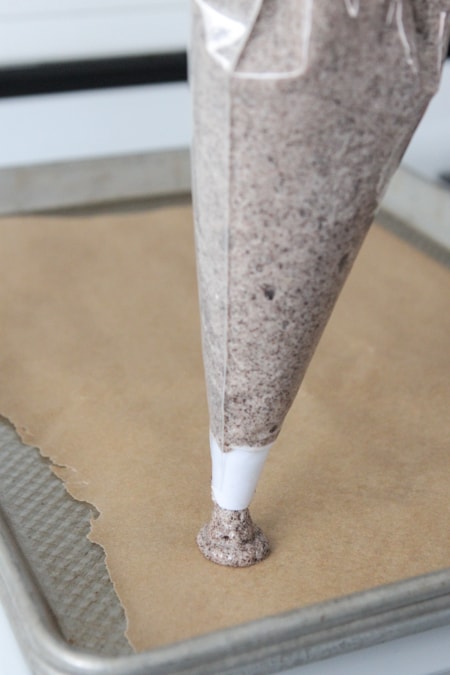
I count to about 5 seconds while piping each. The picture shows me just starting the piping. They were all pretty close in size.
Here’s my macarons after they were piped. You’ll notice after you pipe them they’ll have a little “hat” or “hershey kiss top” as I think it looks like. That little hat falls as you finish piping.
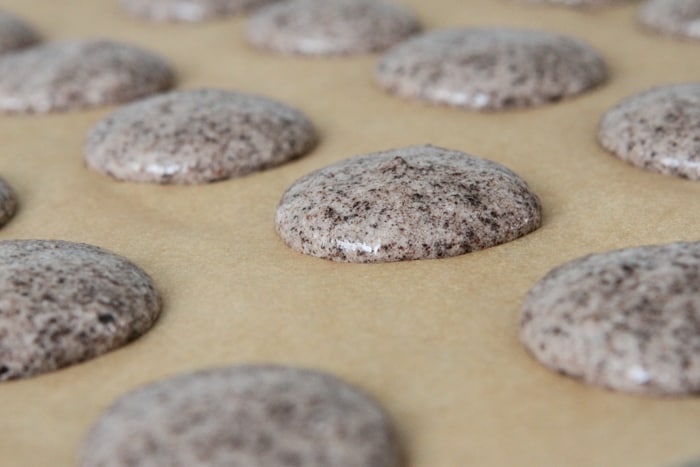
A little close up of the cookie bits sprinkled throughout. Once your done piping, give the pan a good firm tap or two to remove any bubbles.
Let Macarons Rest For 30-45 Minutes
So, here’s the part where I used to let these sit for 30-45 minutes before baking them. I tried it both ways and I am telling you, I got the same beautiful results baking them right after I piped them! No more waiting, yippee! Bake them in a 280 degree preheated oven for 22-25 minutes.
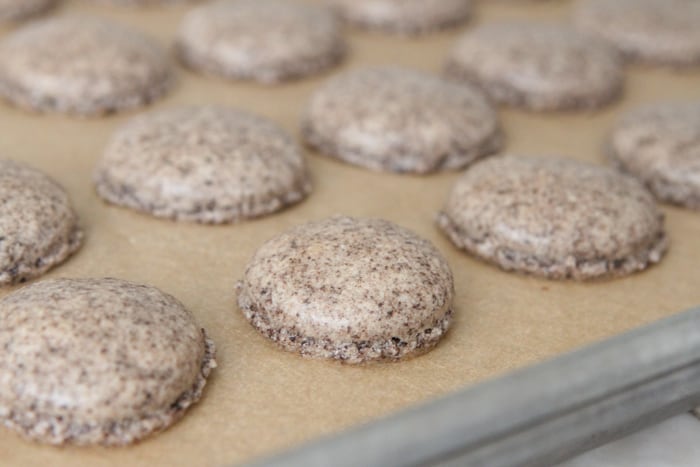
Here’s what they’ll look like out of the oven. You’ll notice a shell on top with the little “feet” around the edges. A couple things I’ve learned. If you take them out too early, they’ll be REALLY hard to remove from the parchment paper and the centers are somewhat hollow. I did this with one batch a couple days ago that I took out right at 20 minutes. I waited a couple hours and they were still really “sticky” underneath. I found the best results when I gave them 24 minutes. After 5 minutes they practically came up from the parchment with minimal resistance. So, learn from my mistakes 🙂
Oreo Buttercream
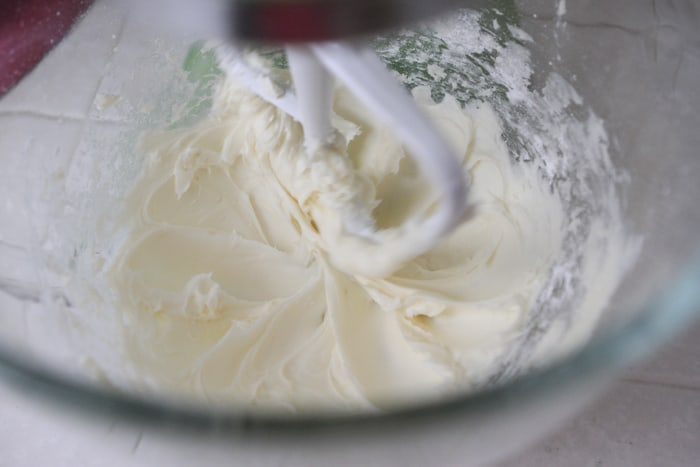
While the macarons are cooling let’s make the buttercream. Whip a stick of softened butter with a cup of powdered sugar.
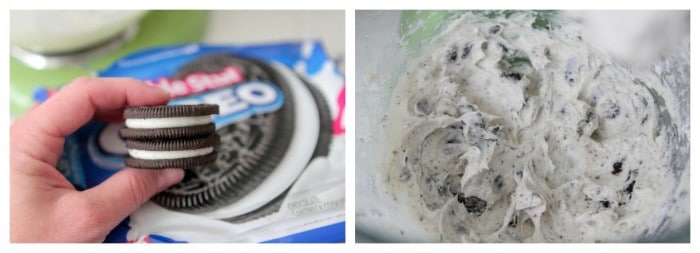
Crumble 2 Oreo cookies into the buttercream and beat until combined. Make sure you crumble them pretty good or it’s hard to pipe them through.
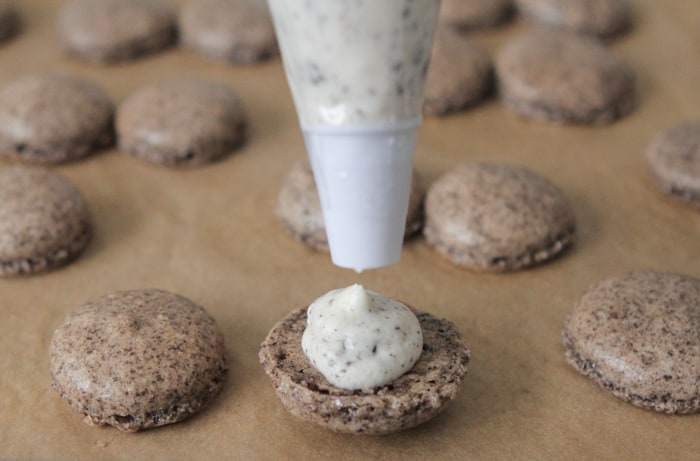
Once the macarons are cooled and loosened from the parchment, pair them up with others that are the same size. Place your buttercream into a pastry bag with the same size round tip. Gently flip the macaron over and pipe just a little dollop of Oreo Buttercream in the center.
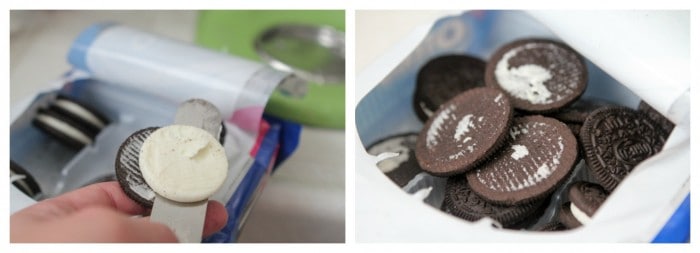
Totally optional, you can scrape the Oreo Cream from the Double Stuf Oreo and add it on top of the frosting. I highly recommend it.
Place a small dollop of frosting on top of the Oreo cream layer to help the second macaron stick.
Easy Macaron Recipe
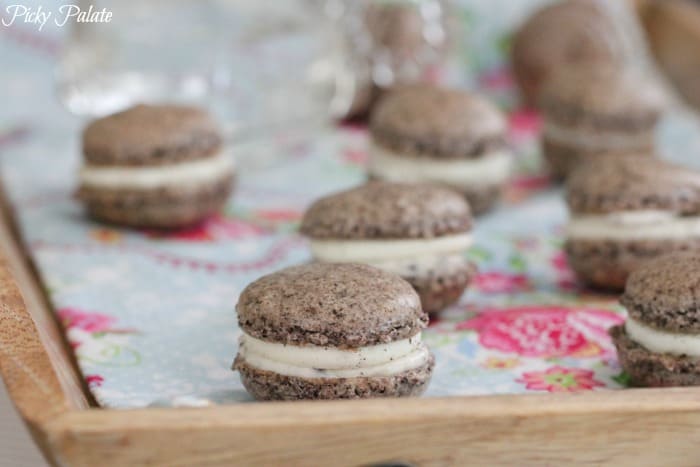
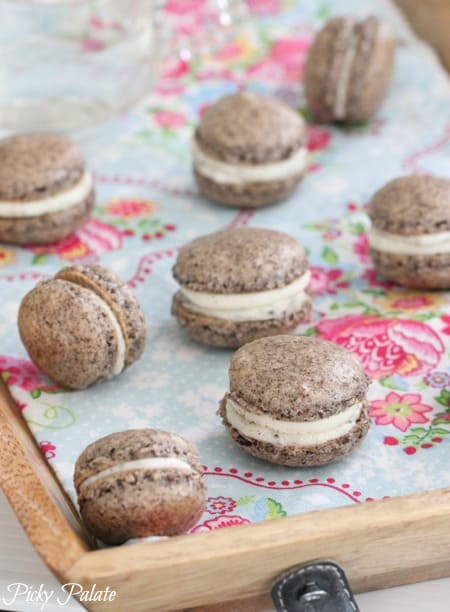
Let’s just say these are little bites of heaven. Store your macarons in an airtight container in the refrigerator. They are great for 3-5 days. Some say they are best eaten on the third day. I say they are best eaten any day, all day 🙂

Homemade Cookies and Cream French Macarons
Ingredients
- 95 grams egg whites close to 3 large egg whites
- 65 grams almond meal/flour
- 200 grams powdered sugar
- 25 grams granulated sugar
- 45 grams finely ground up chocolate wafers
Oreo Buttercream
- 1 stick softened unsalted butter
- 1 cup powdered sugar
- 2 whole Oreo Cookies I used Double Stuf
Instructions
- Preheat oven to 280 degrees and line a large baking sheet with parchment paper. Weigh your egg whites, almond flour, powdered sugar, granulated sugar and ground chocolate wafers on your food scale.
- In a stand mixer with the whisk attachment add your weighed out egg whites, and sugar beating on medium speed. Beat on medium-high until stiff peaks form. Takes close to 5 minutes. See pictures for visuals. Set aside for a couple minutes.
- Place the powdered sugar, almond flour and chocolate wafers into a large mixing bowl. Stir to combine. Place in a sifter or fine sieve and sift until all dry ingredients have passed through. Gently fold in the egg whites to the dry ingredients, mixing only until just combined. See pictures for visuals
- Place batter into a large pastry bag with a large round tip attached. Pipe rounds, about 1/2 inch apart onto a parchment lined baking sheet. Give a good tap or two of the pan to remove any bubbles.
- Bake macarons for 22-25 minutes. You’ll see a shell on top with “feet” around the edges. Let cool completely before removing. Once cooled, take an offset spatula to loosen from parchment. Pair the macarons close in size to each other to prepare for filling.
- To prepare buttercream, beat softened butter and powdered sugar until creamy and smooth. Add 2 crushed Oreo Cookies to the frosting, beating until combined. Place buttercream into a medium pastry bag with a large round tip attached and pipe a dollop of frosting on the center of a macaron. Top with the cream center of an Oreo Cookie if desired, place one more smaller dollop of frosting over the cream center then top with a second macaron. See pictures for visuals. Serve room temperature. Store any remaining macarons in the refrigerator.




 Welcome to my online kitchen! Picky Palate is where you’ll find family friendly recipes along with the best Disney eats, tips and copycat recipes!
Wowza. I want these so badly!
Ok, you just gave me a reason to get back to making macs. I tried once and failed, but I think I figured out a few reasons why. And oh my oh my! Oreo center in the mac filling?! Soooo needed! These look perfect Jenny!
I love these!!! They look amazing. And I love it your way!!
They turned out amazing and what an awesome flavor! Great job.
You did it!! And I’m so glad you did a tutorial-style post on it. Very helpful. I made macarons a few times in college, only once with great success. I still collect recipes and say I’ll make them again…I think I’m just about ready 😉
You have impeccable timing! I’ve printed off two different recipes by Martha Stewart for macarons to make for a friend’s baby shower this Saturday. I think I will switch to this recipe!! These look absolutely fabulous! And delicious!
If I wanted to make plain macarons, what should I substitute the 45g of cookie crumbles with?? I was thinking of doing plain macarons that are colored with a different flavored filling.
Thanks for posting such a great, easy to follow recipe. If you’re in the Nashville area, I could sure use a hand! 🙂
What a great tutorial! I’ve made macs once, with less than stellar results, but I’m determined to try again. I followed Brave Tart’s instructions before, but I’m baking in a new apartment, and I think the oven is a little tempramental. Your’s look amazing…those feet! So perfect 🙂
My head just exploded. Oreo cookie middle INSIDE A MACARON!!!!!! 🙂 LOVE IT!! 🙂 Making these ASAP. I am totally trying all your shortcuts next time!! Macarons might be a regular happening around here now!! 🙂 Love, love, love this Jenny!! xoxo
I always love how many pictures you put into your posts! These look so good, although I might have to eat a few Oreo cookies along the way.. :P.
Thank you for the awesome tutorial!! I’ve been wanting to make macarons for a while and Oreo is my favorite! So this looks like the perfect recipe! Can’t wait to try it and report back!
Your macarons look amazing! I just made some last week using the Brave Tart method and it worked great for me too.
Absolutely gorgeous!! These would makes such a lovely food gift.
This is such a great post! For everyone who is scared- they are not toooo hard to make! and that flavor Jenny! who else would dream up an oreo double stuff macaron!?
wow i love this flavor!! i tried my hand at macarons and failed. i even followed brave tart’s post! i guess i’m not cut out for it. will have to try again soon!
I love how you make us feel more comfortable making macarons ~ they always intimidate! Love the flavor too 🙂
i am sooo on your page…love this post & adore all your stuffed cookies!
yay! trying this ASAP!
I just made macarons yesterday and now I cannot wait to try a cookies and cream version! These look delicious!
That 45 minutes of waiting for the feet to form is torturous!! The anticipation just kills me, good to know I don’t have to wait anymore!!
Love these! I’ve only made macarons ones, but I need to try again with a scale. Even though I have one I for some reason didn’t feel like using it. But then I didn’t end up with the feet sooo guess the joke’s on me.
These macarons look gorgeous Jenny! Love the double filling! I think BraveTart’s tips are amazing too but sadly my first attempt at macarons did not turn out as gorgeous as yours:) Thanks so much for simplifying all the steps with such helpful photos, this inspires me to try making macarons a second time one day:)
Yes, been waiting for this post for a few days now! Can’t wait to make them soon! 🙂
I do not know how to begin to describe how amazing these look. I have never had a macaroon before but these are the first ones I would want to try!
Wow! These look beautiful, Jenny! Thanks for simplifying the process, too! 🙂
Macarons are one of those baked goods I’ve wanted to try for some time but am always so intimidated. I love your step by step! Also, loooove that you went cookies n cream with these – Oreo anything is my favorite!
What a great idea for macarons! I really like the double stuffing as well! 🙂
They look fab Jenny!
I have never made macarons because I thought they were too fussy, too. So glad you have a shortcut! I can’t wait to make them.
I have always wanted to try making macarons – and this flavor combination looks like perfection!
Yup, just as amazing as I knew that they’d be. mmmmmm
Thank you Jenny! These are awesome and you have showed me my fear of macaron making is just plain stupid!!!
These look awesome and i LOVE the cookies n cream. Obviously!
SO I guess I need Amanda to come stay with me for a week. I have always been a little scared of macarons!
These look so great! And of course, Double Stuf 🙂
What a beautifully written post! These macaroons look so good – wishing I could eat them for breakfast 🙂
These look so incredible! I would totally use the oreo fillings, I think that’s a no-brainer! 🙂
So fun, Jenny! And I agree, BraveTart has AMAZING tips for macaron making…and takes the scary out of it. Going to check out Amanda’s printable guide! Yay! I hate drawing those circles! 😉
Wow. Jenny. This post was amazing!!!! I learned a ton. I have never made them. Just not something I’ve ever had the desire to make b/c I hear so many horror stories!
Seeing all those circles on the baking sheet and piping bag reminds me of whoopie pie making.
Thanks for simplifying this, taking out non-essential steps, i.e. chilling, and breaking it all down. The photos are sooo helpful. And I love that you scraped off double-stuff Oreo filling and included that. Oh yeah! 🙂
Wowza! My hat is off to you for making these in the first place and for making them so beautifully! They intimidate the baking right out of me! Well done!