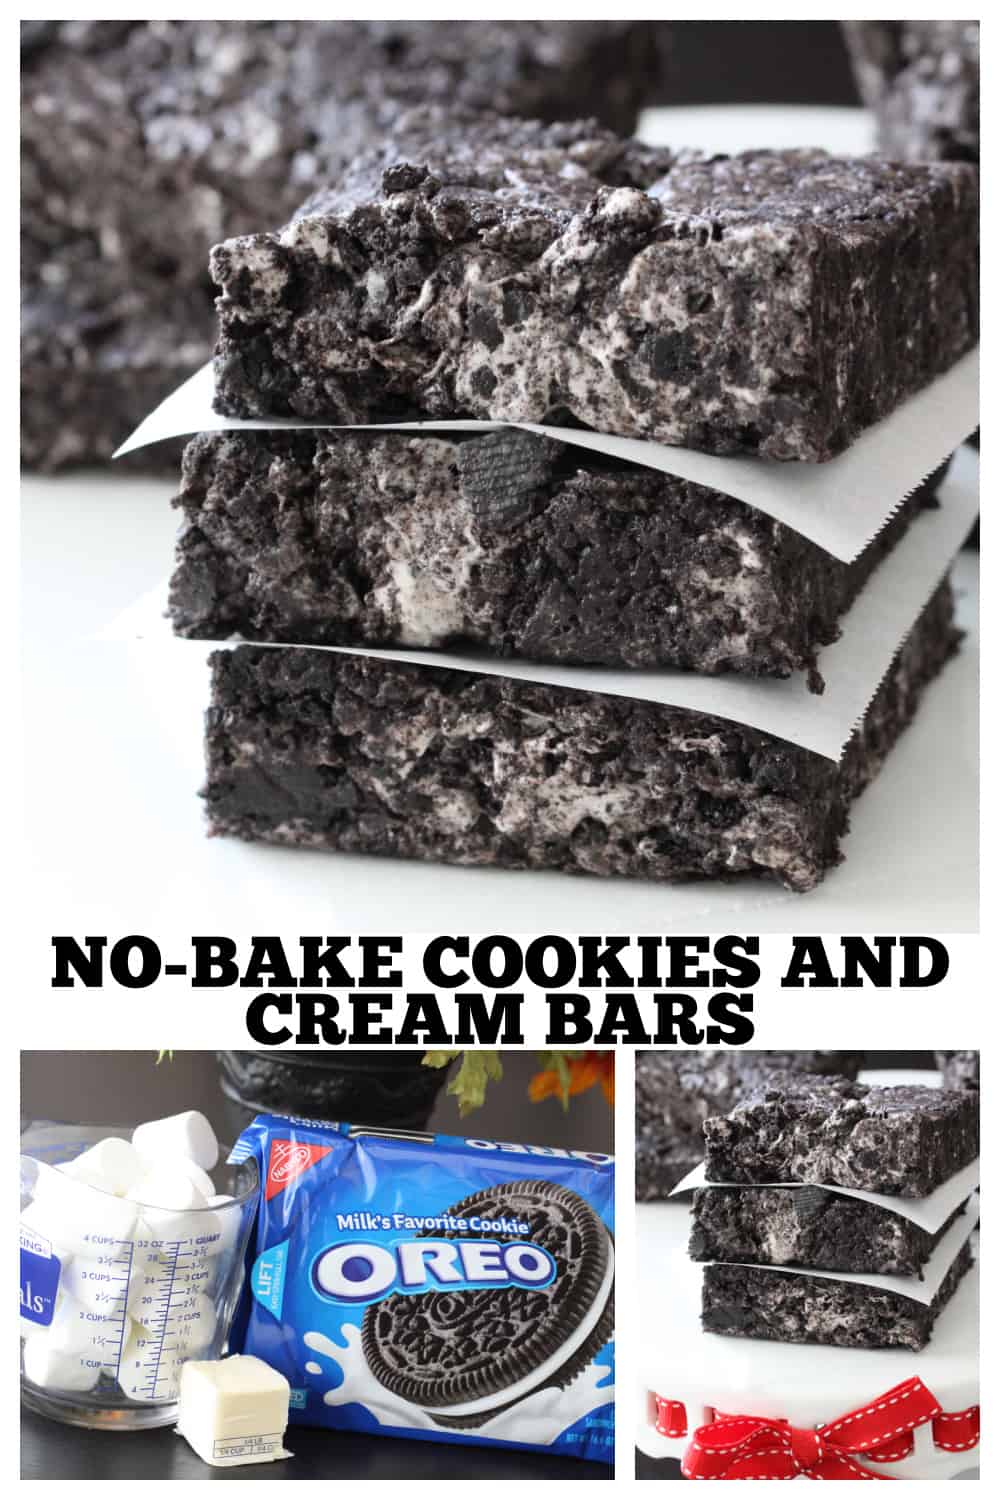
These No-Bake Cookies and Cream Bars are so chewy, rich and delicious! You’d never guess that this decadent dessert is made with just 3 ingredients! It’s not only delicious, it only takes about 15 minutes to prepare!
If you love marshmallow treats like we do, be sure to also try our Chewy No-Bake Nutter Butter Bars.
No-Bake Cookies and Cream Bars
I love a treat that can be whipped up in about 15 minutes. My boys and their buddies couldn’t get enough of these Chewy Oreo Bars we had as an after school snack this week. Yes, you use an entire package of Oreo Cookies, but what you get in return is a marshmallow-y Oreo treat that is worth every bite. Surprise the kids (and yourself) with this one, they’ll be all smiles, Enjoy.
Why You’ll Love This Recipe
- Only 3 Ingredients. One of my favorite things about this recipe is there’s only 3 ingredients you need to pick up from the grocery stores!
- Quick and Easy. Start to finish, you can get this recipe made in about 15 minutes.
- Great For Parties. These sweet squares are easy to transport to any party or occasion where dessert is needed.
Try my Oreo Stuffed Chocolate Chip Cookies recipe too! Be sure to follow Picky Palate on Instagram for daily recipe inspiration!
What You’ll Need
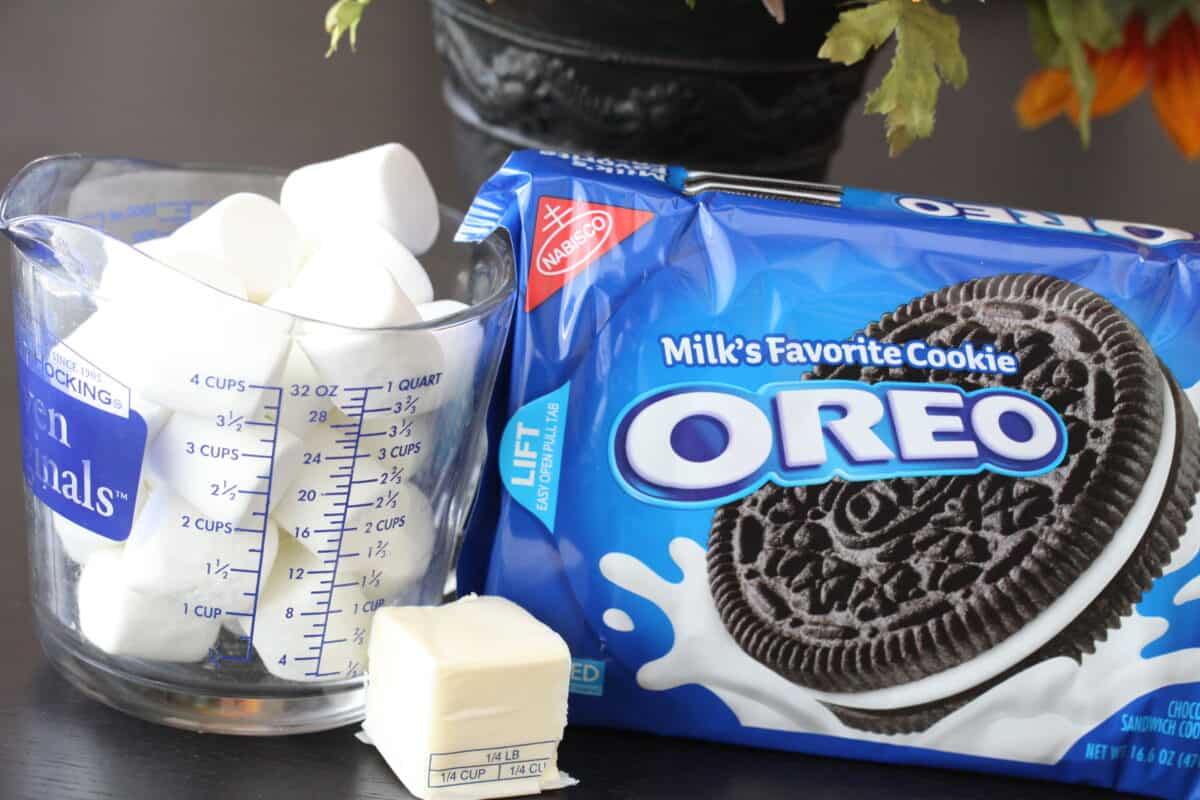
Here are the 3 ingredients needed to make this easy no bake dessert. See the recipe card located at the bottom of the post for full details and instructions.
- Oreo Cookies– You can use the regular Oreos or Double Stuf or even Mega if you like.
- Marshmallows– I used the full size large marshmallows for this recipe. Find marshmallows in the baking section of the grocery store. I’ve also made this recipe using mini marshmallows. You’ll use 7 cups of mini marshmallows and 6 tablespoons of butter if using mini.
- Butter– I generally use salted butter for my recipes, unsalted works just fine too.
How To Make No Bake Cookies and Cream Bars
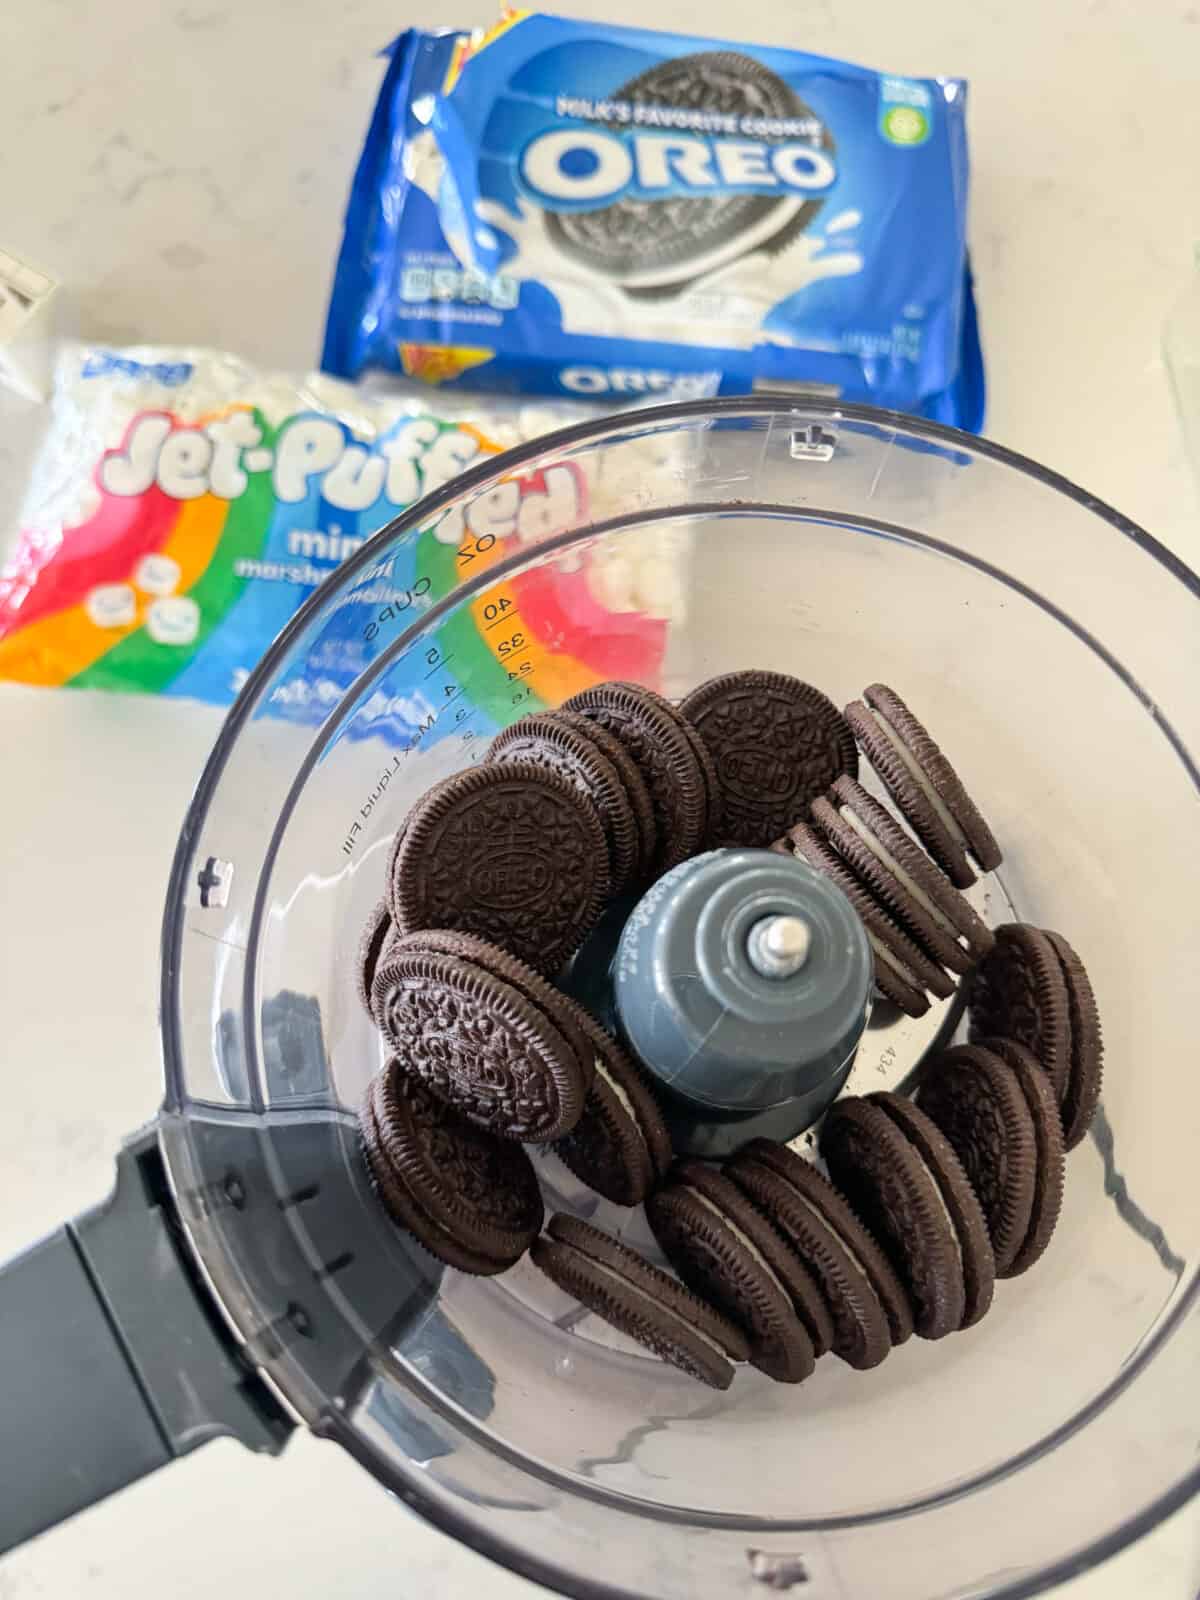
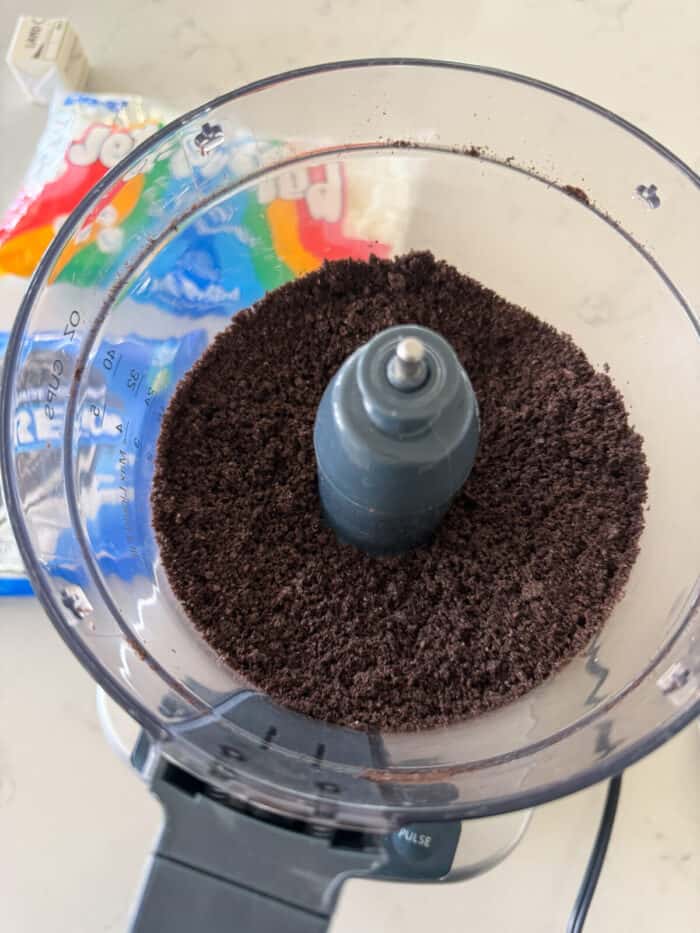
Crush Oreos. Place all of the Oreos in a food processor or blender and mix until ground. If you don’t have a food processor, you can use a high powered blender or even put the Oreo Cookies inside a large zipock and use a rolling pin to crush. I’ve used all methods. It’s great if there are some Oreo’s that aren’t fully crushed. Gives some good texture to the bars.
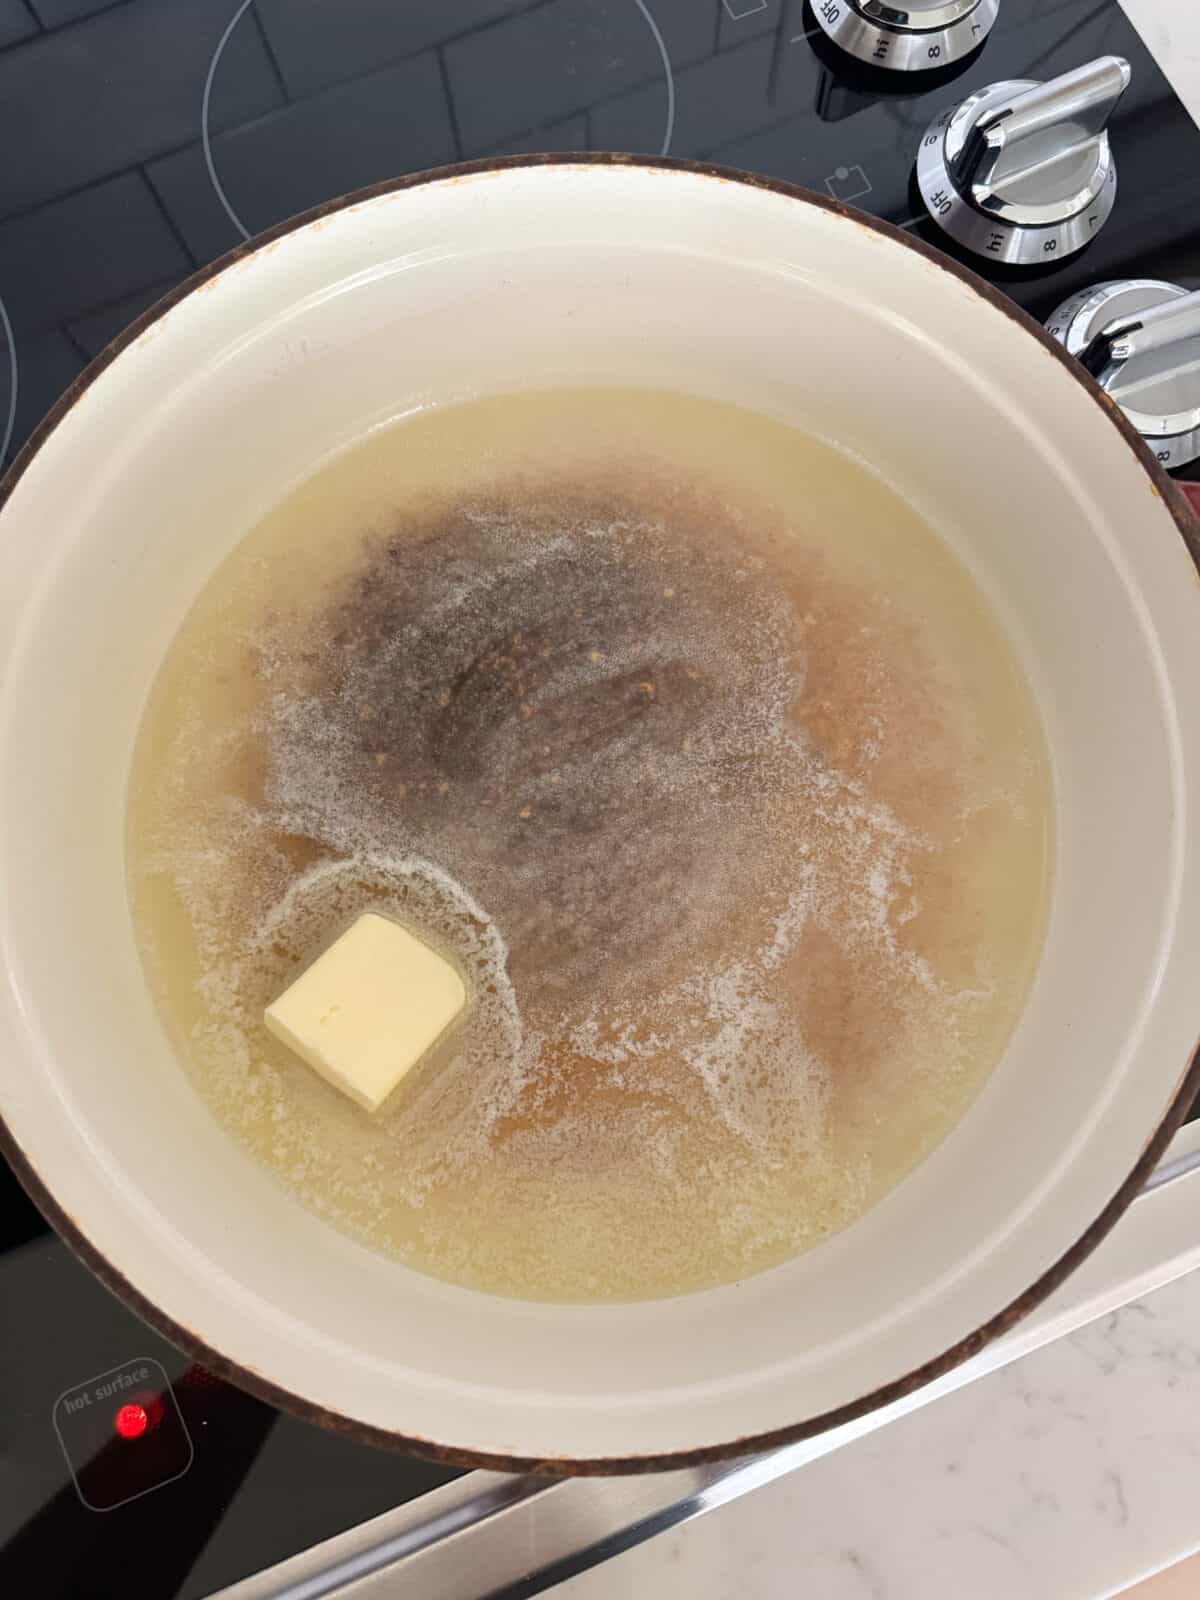
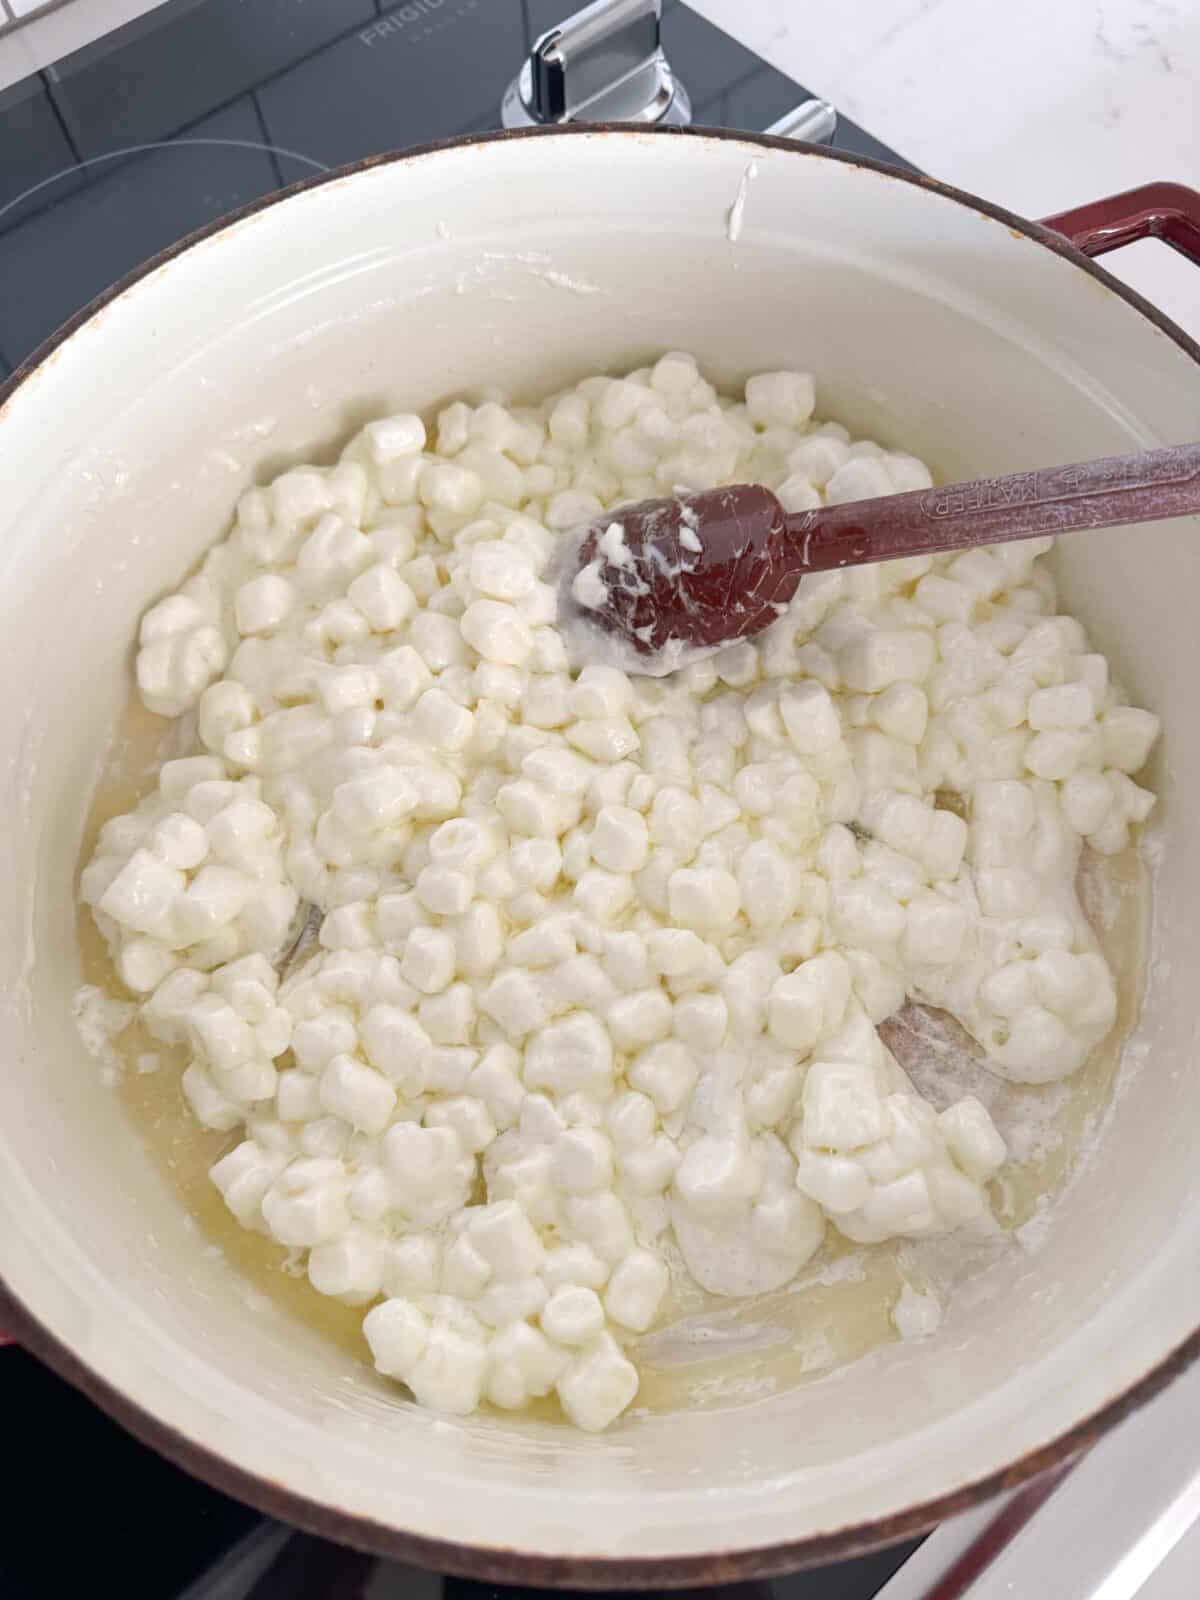
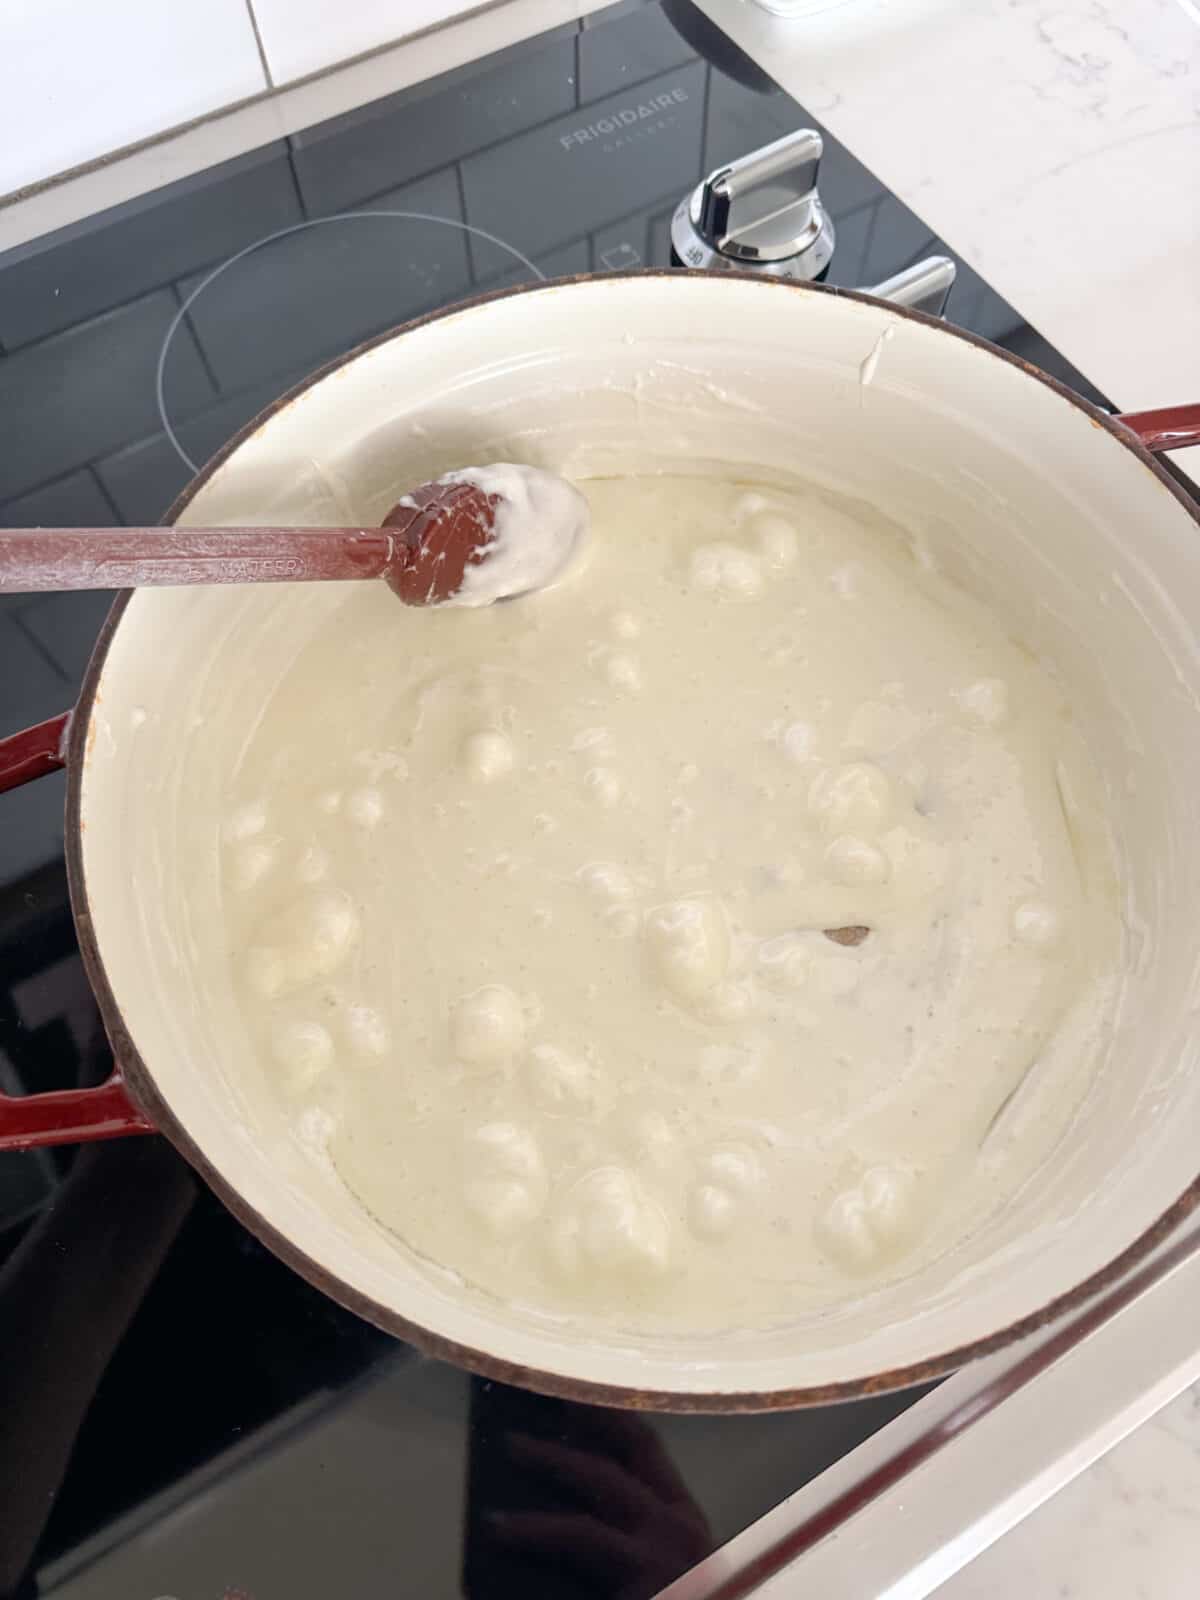
Melt Marshmallows. Melt marshmallows and butter in microwave in a large heat proof bowl until puffed, about 1 1/2- 2 minutes. You can also melt the marshmallows and butter over the stovetop in a large pot if desired. If using a pot over stovetop melt over medium to medium low heat and stir contantly until melted.
Note. If using large marshmallows, you use 5 cups large marshmallows and 4 tablespoons butter. If using mini marshmallows, use 7 cups mini marshmallows and 6 tablespoons butter. You can melt butter and marshmallows in a large heatproof bowl in the microwave for 1 1/2-2 minutes, or over stovetop in a large pot over medium heat stirring until melted.
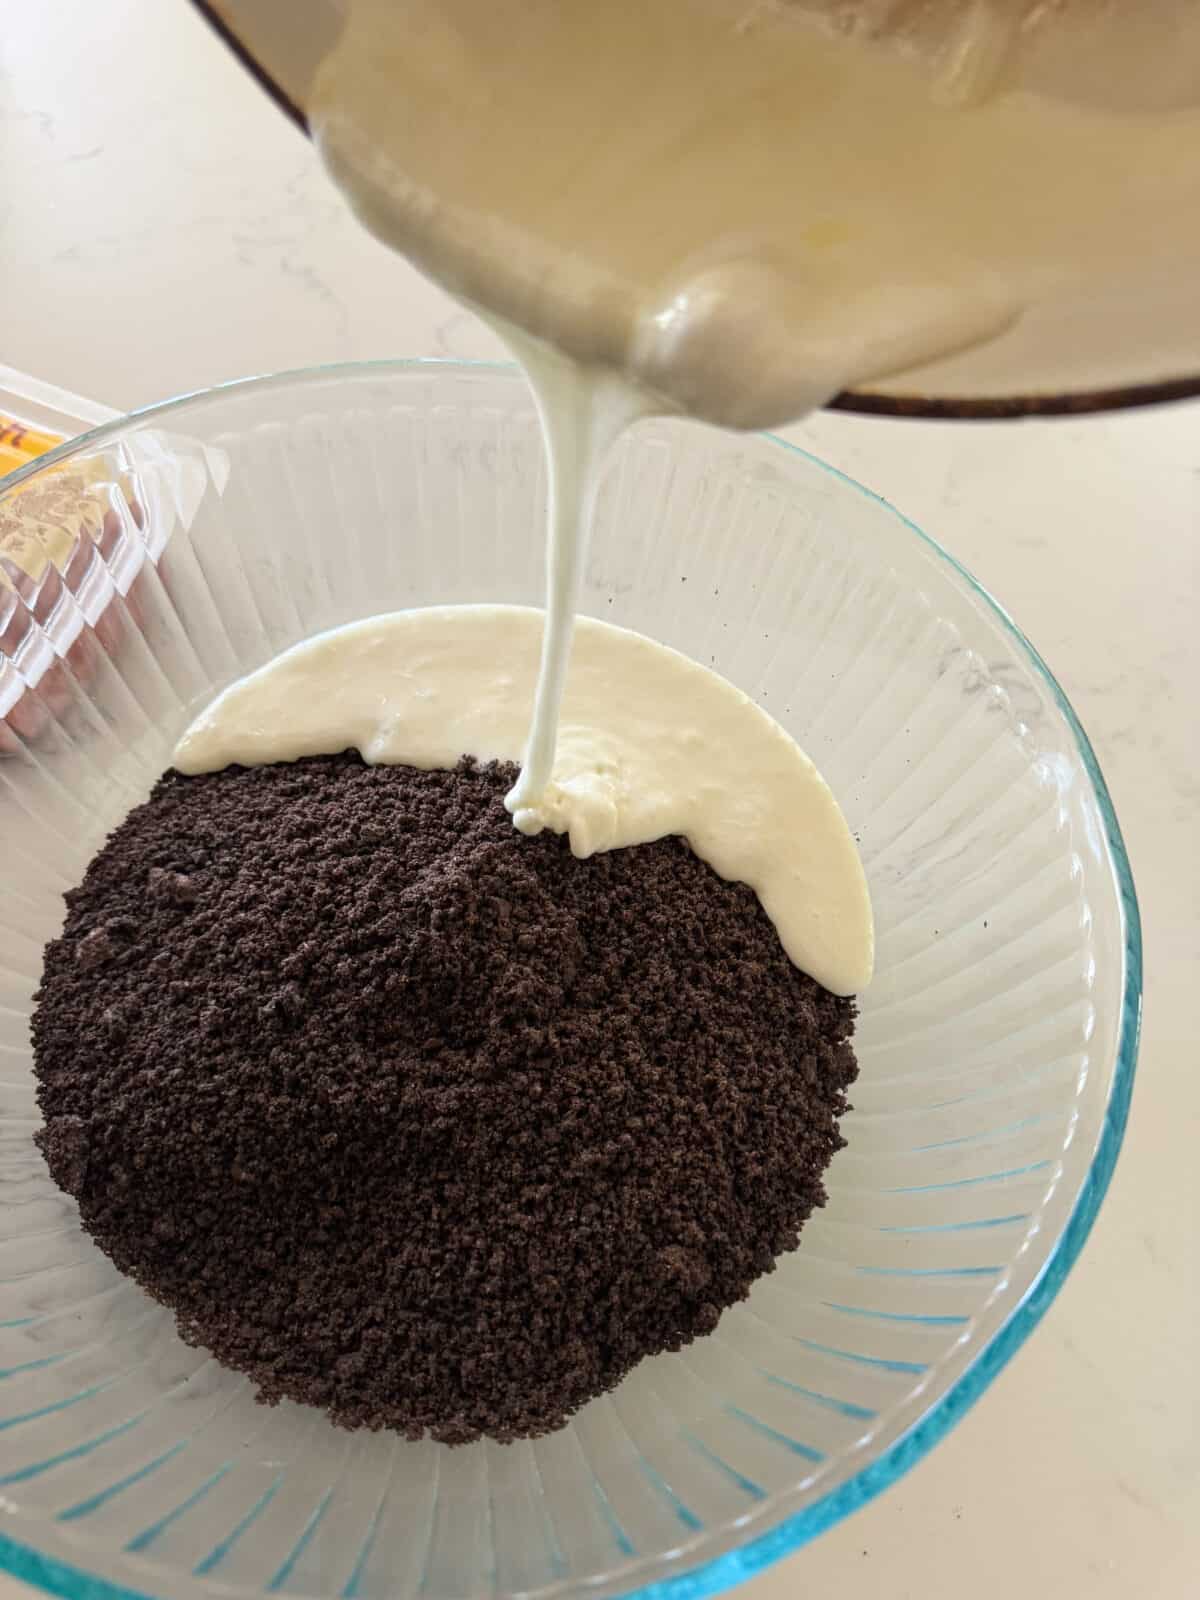
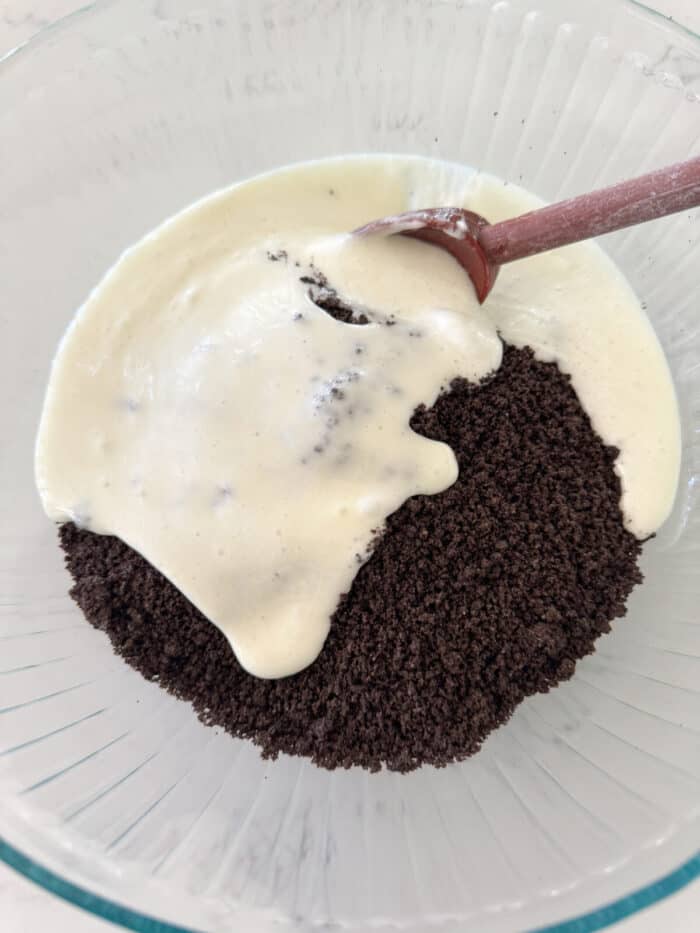
Combine Cookies and Melted Marshmallows. Working quickly, pour the ground cookies into the melted puffed marshmallows. Marshmallows will begin to set up pretty quick.
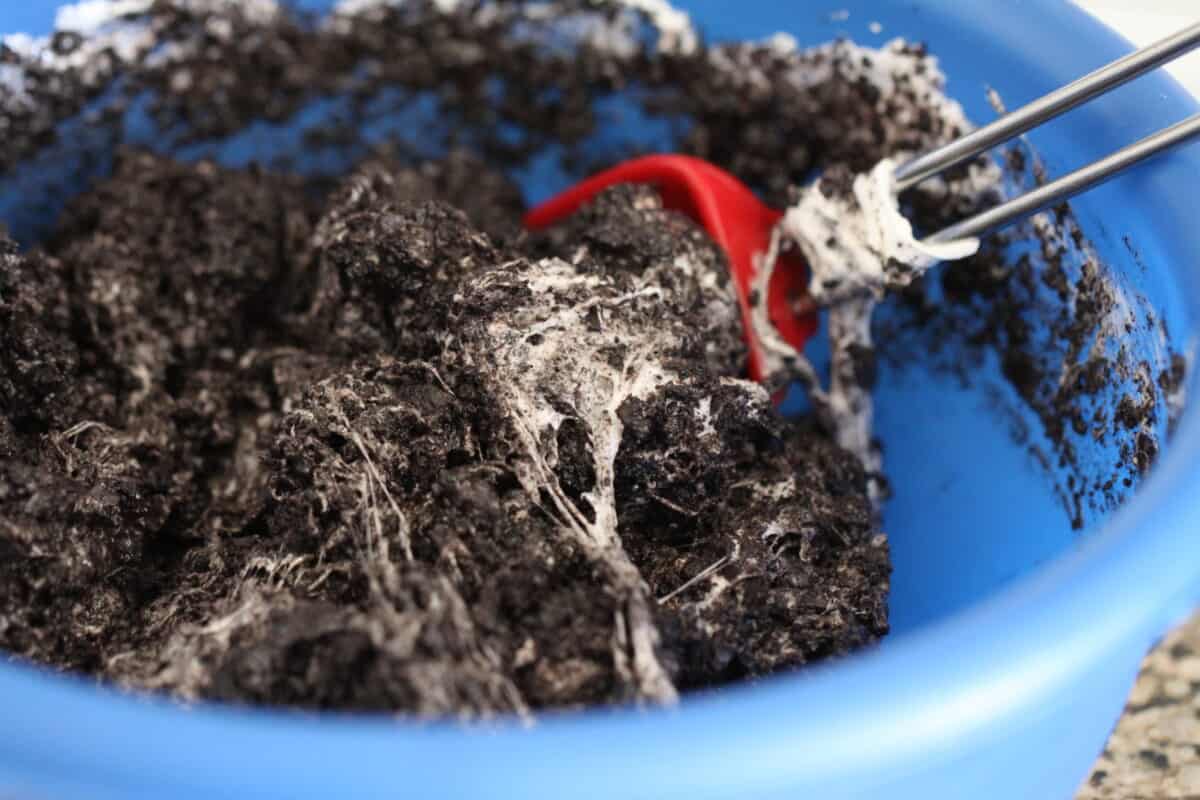
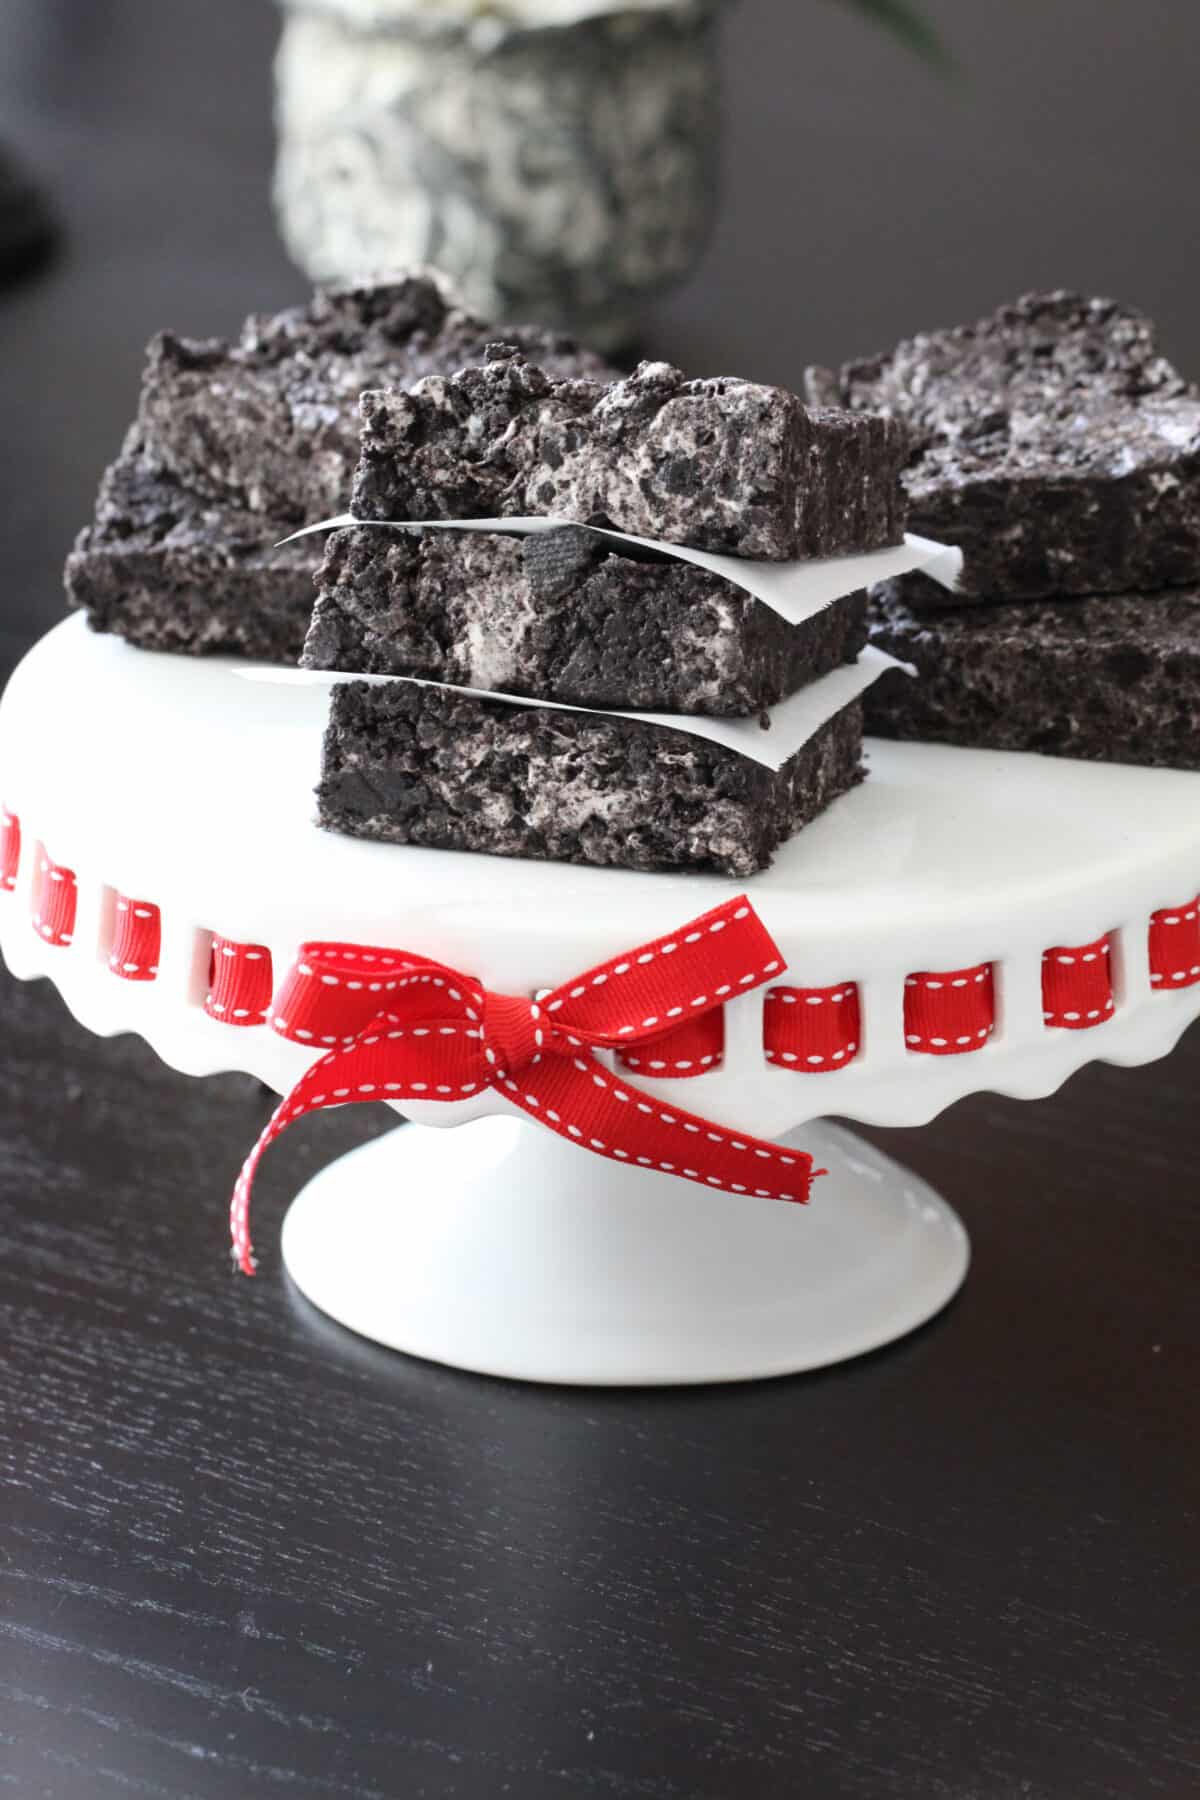
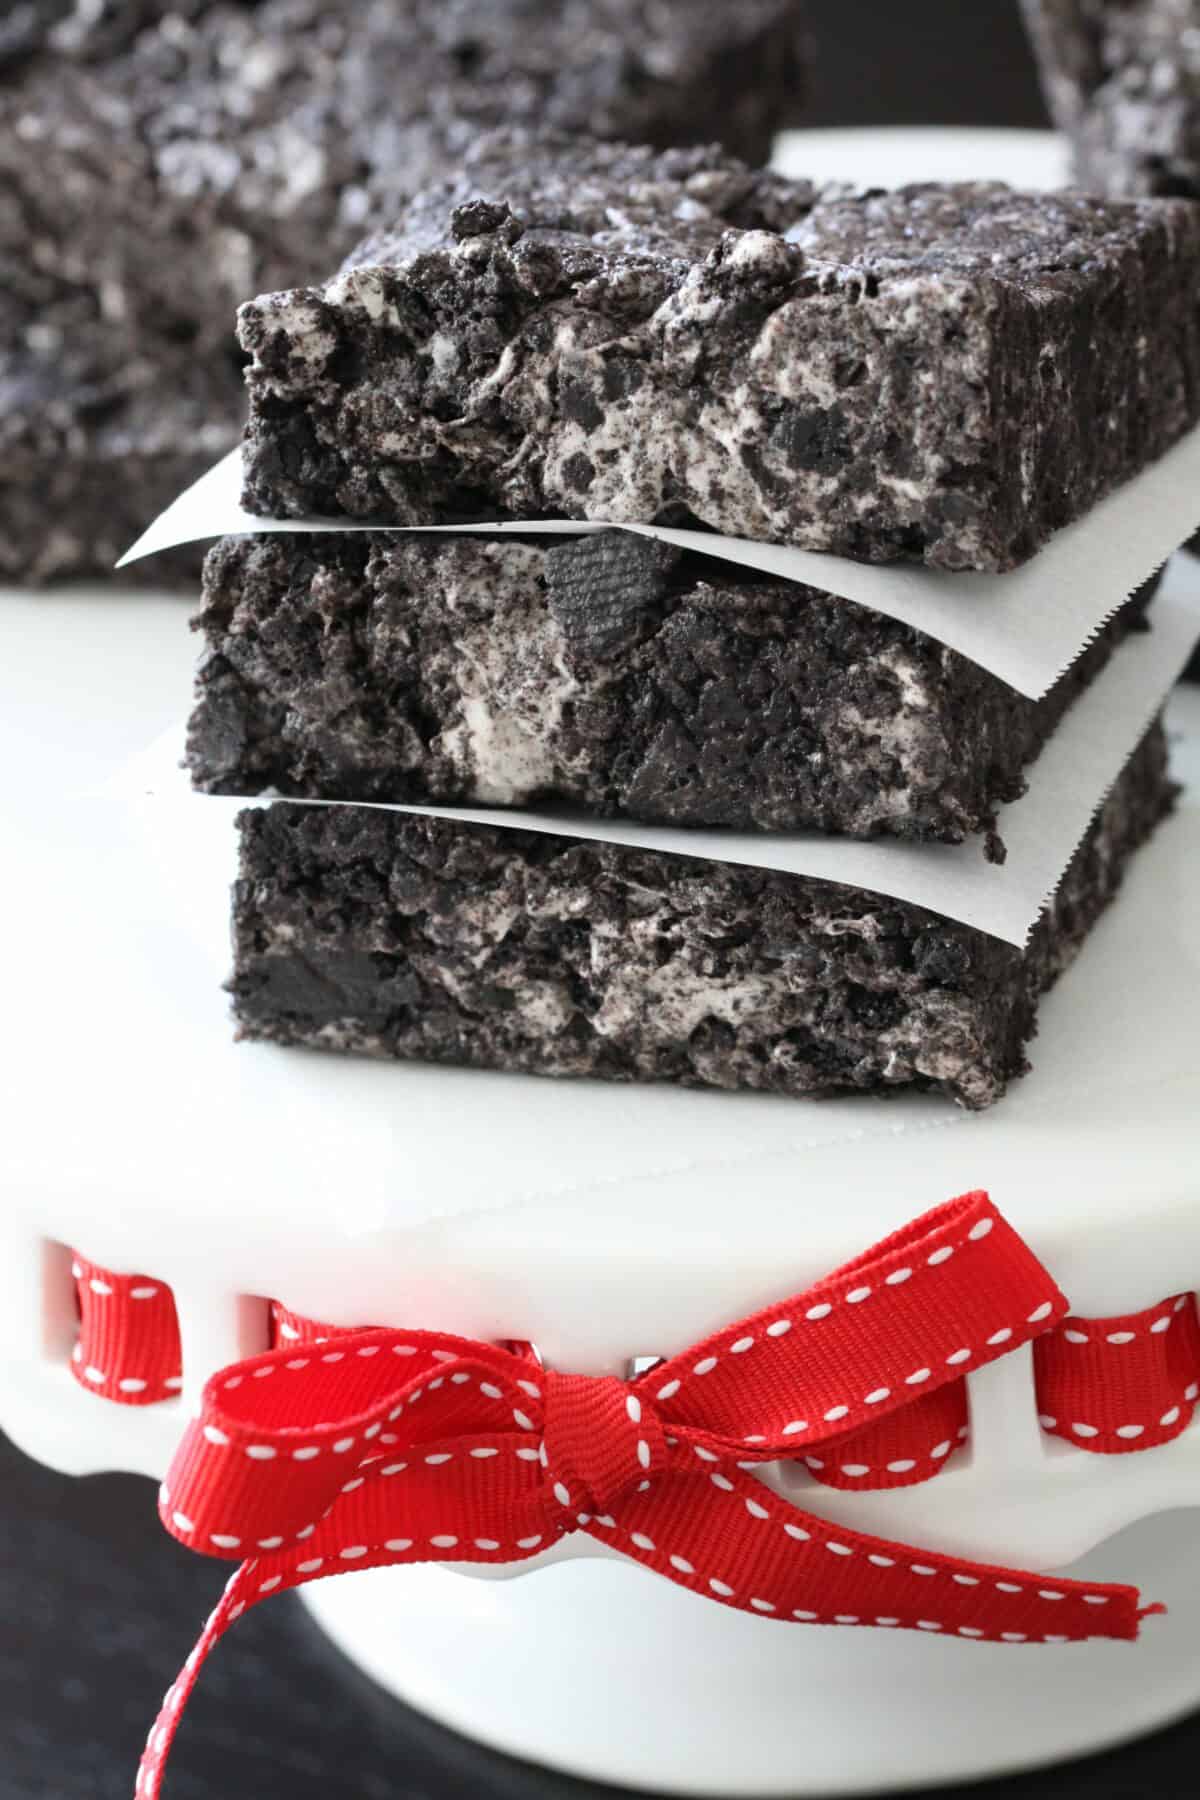
Transfer Mixture To Pan. Mix quickly and press into an 8×8 inch pan and let cool for 10 minutes. Cut into squares to serve.
Recipe Tips For Success
- Measure Out Ingredients In Advance. Make sure you measure out your ingredients before starting. Once the marshmallow mixture is melted, you need to work quick.
- Use Fresh Marshmallows. Check your mini marshmallows to make sure they’re fresh and soft. Sometimes when they’ve sat in the pantry for too long, they get hard.
- Plastic Knife. Use a plastic knife to cut into squares to prevent sticking. I cut into squares before the treats get to room temperature. Still somewhat soft makes for easier cutting.
- Grease Hands. Use a little softened butter or cooking spray on your hands to press warm treats into pan. Prevents it sticking to your hands.
How To Serve
Serve bars room temperature on a cake stand or individual plates. Use a plastic knife to cut into squares while bars are still semi-soft or use a sharp knife that’s been buttered or sprayed with cooking spray. These cookie bars are so perfect for any dessert party, birthdays, holidays. So easy and everyone really loves them!
Leftovers
Store any leftovers in an airtight container or Ziplock bag for up to 3 days for best tasting results. I don’t recommend freezing or refrigerating these bars.
Try More Easy Marshmallow Desserts
No-Bake Cookies and Cream Bars
Equipment
- Microwave
- food processor
- mixing bowl
- mixing spoons
- plastic knife
- parchment paper
- rubber spatula
Ingredients
- One 16 oz package of Oreo
- 5 cups Large Marshmallows or use 7 cups mini marshmallows
- 4 tablespoons butter 6 tablespoons if using mini marshmallows
Instructions
- Place Oreos in food processor and pulse until ground.
- Melt marshmallows and butter in microwave in a large heat proof bowl until puffed, about 1 1/2- 2 minutes. If using the stovetop method to melt your marshmallows, place butter into large pot over medium heat to melt. Stir in marshmallows until melted. Remove from heat and pour in ground Oreo Cookies. Stir to combine then transfer to a parchment lined or greased 8×8 inch baking pan. Note: If using mini marshmallows, measure out 7 cups of mini marshmallows and 6 tablespoons of butter.
- Let set up for 10 minutes. Use plastic knife to cut bars into squares to prevent sticking.
Video
Notes
- Mini Marshmallows. If you’re using mini marshmallows, you’ll need 7 cups mini marshmallows and 6 tablespoons of butter.
- Stovetop Method. If you’d like to melt your marshmallows over the stovetop, place butter into a large pot over medium heat until melted. Add marshmallows, stirring until melted.
- Measure Out Ingredients In Advance. Make sure you measure out your ingredients before starting. Once the marshmallow mixture is melted, you need to work quick.
- Use Fresh Marshmallows. Check your large or mini marshmallows to make sure they’re fresh and soft. Sometimes when they’ve sat in the pantry for too long, they get hard.
- Plastic Knife. Use a plastic knife to cut into squares to prevent sticking. I cut into squares before the treats get to room temperature. Still somewhat soft makes for easier cutting.
- Grease Hands. Use a little softened butter or cooking spray on your hands to press warm treats into pan. Prevents it sticking to your hands.
Nutrition


 Welcome to my online kitchen! Picky Palate is where you’ll find family friendly recipes along with the best Disney eats, tips and copycat recipes!
Take a pkg of regular Oreo’s and process. Add 1 8oz pkg of cream cheese, process and chill for 1 hour. Roll in balls and dip in melted white chocolate……….these are so good.
Oreo Truffle Balls
That is around 3600 calories in the pan, and that makes 400 calories a bar…… I definitely would be able to eat three no problem (no problem for anyone but my waistline and those that want to share!)
Exercise, moderation, share and spread the love. 🙂
Wow, this looks so tempting! Hehe, I better leave this site…because your pictures are absolutely mouth watering!!!
Your posting really sratihgtened me out. Thanks!
glG5Eh ddekgosijvnq
These look amazing..and so darn easy.
I love you more and more each day.
This looks amazing. And easy.
I haven’t bought a package of Oreo’s since…I don’t know when. These look like the perfect excuse to buy some!
OMG! I have a package of Golden Oreos hidden from the kids and the hubby. (Those are the favorite Oreo in this house.) Do you think those would work for this?
You piqued my interest with trying Golden Oreos. Let me know if they turn out.
OK, so I made the Original Oreo and a batch of the Golden Oreo ones. YUM on both!!! Now I am debating doing this with graham crackers and milk chocolate chips. What do you think?
OOOOOH MY GOSH, that sounds DELICIOUS!!!!! Cannot wait to try these!
I may have to try these but with non-chocolate cookies (unfortunately I am allergic to chocolate), maybe vanilla or lemon sandwich cookies. Hmm… I can almost taste them now. 🙂 Thanks for sharing your recipe.
Love this Jenny!! No bake is so simple & just as delicious as baked 🙂 xo
Very creative! Opens up all kinds of possibilities…
What a great idea!! I love no bake anything =)
YUM!!!! What a fun treat!!! I don’t know if I’d want to sacrifice the original oreo goodness, though. hmmmm…will have to contemplate this one… 🙂
I suppose you could use any cookies for this – Nutter Butters??
Wow! You’re on a roll with Oreos–yum! I just bought some mint ones–those would be good in this recipe too!
Imagine if you added a little peanut butter to this?! Mmmmm!
Oh. My. These look way too good right now. Doesn’t help that Oreos are my favorite cookie! Such a creative recipe, and so simple!
These might just be the most scruptious-looking pieces of goodness EVER. Thanks for sharing!
Why do you do this to me? I was never much of a dessert fan and then I started watching your blog several years ago and now I am hooked. Looks delicious as usual!
Okay I have a very serious question for you.
Just how many packs of Oreos do you go through in a week?? LOL!
I love a quick and easy treat- yum yum!
Oh Sara, you don’t want to know, lol!! When do I get to see you next?!! You guys coming to So Cal for a book tour?
these look great! and only three ingredients!
wow. YUMMY!!!! I think I’ll try these the next time my girls have friends over.
I love this! I’ll definitely be making these ASAP, they look absolutely fabulous.
Now my brain is reeling with what else I could make into a Rice Krispy treat-type bar!
pretty sure i could eat a whole pan of these! yum!!
I LOVE having a few no bake desserts on hand! I keep the ingredients in the pantry, and when someone calls to tell me they are coming over shortly, I tidy up the house and make a quick dessert that will be ready when they arrive! This one is perfect! Thanks!
Yum! And so easy too!
Wow, every dessert recipe you come up with is so amazing! i LOVE all of your ideas 🙂
What a sweet compliment Natalie, thank you 🙂
These look really good! I have a really easy oreo truffle recipe that I need to post soon. Thanks for the reminder!!! 🙂 Today I’m focused on green cocktails on my blog…in the spirit of St Patty’s Day. Yumm!
Oh yum this is amazing. Now getting fat is even easier for me 😉
Uh oh! You’ve discovered my weakness. I’m going to go crazy on these. Yum!
this is sooooo dangerous…now i won’t have any excuses for not making dessert in the summers!
do we have to refrigerate it or just let it set?
Wow! These look amazing!
This is the best twist on rice crispy treats that I have ever seen!
Just when I thought cookies and cream couldn’t get any better!
These look delightful! I’d like one for breakfast. 🙂 How perfect with warmer weather coming!
Jenny…you are my hero!!!
You made a
no bake dessert
using oreos
using marshmallows (i love!)
and it’s like rice krispy treats but with oreos, instead.
And that plate…omg so I bought one JUST like that except with a black and white polka dot ribbon from Marshall’s in San Diego about 2 weeks ago. I am still waiting for the perfect dessert to use it on…I love the red ribbon w/ the black/white dessert you did. Tres chic 🙂